DHIS2
installation
on windows
local machine
DHIS2 Installation on Windows Local Server
Installing DHIS2 is not a very difficult task. There are a few things you need to be aware of. Before installing, you need to know which version of DHIS2 works perfectly with Tomcat and PostgresSQL easily. Let's see the step by step DHIS2 installation process.
The WAR file requires you to install a Java servlet container (like Tomcat or Jetty) and a relational database (PostgreSQL, MySQL and H2 are supported), and is recommended for server setups and environments with high volumes of data and traffic. The latest version is maintained with bug-fixes and minor improvements. You can always get the latest stable release at stable.dhis2.org. Check out the installation guide for Ubuntu Linux here. For the bleeding edge build check out the continuous integration server. WAR files are copied from our continuous integration server where you can find revision number and build time.
Step-01: Necessary Software Installation: You need to ensure the below softwares are running in your machine.
DHIS2 Version upto 2.32, Download full package- 1.1 Install JDK: https://www.oracle.com/technetwork/pt/java/javase/downloads/jdk8-downloads-2133151.html
-
1.2 Install PostgreSQL-11: https://www.enterprisedb.com/downloads/postgres-postgresql-downloads
1.2.1 Select all options during installation including pgAdmin 4 and Stack Builder.
1.2.2 In Stack Builder >> Select PostGIS under Spatial Extensions >> PostGIS 2.5 Bundle for PostgreSQL 11 (32/64 bit)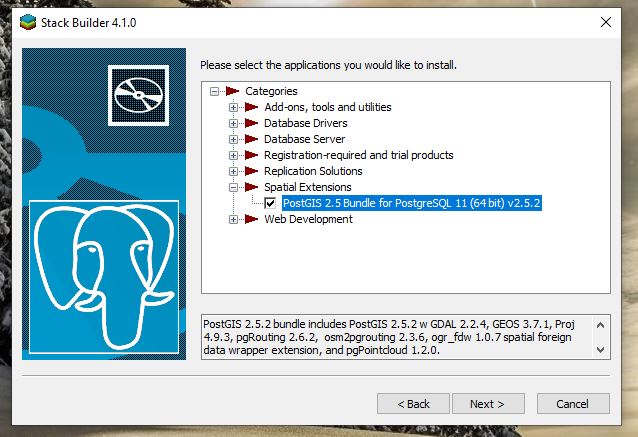
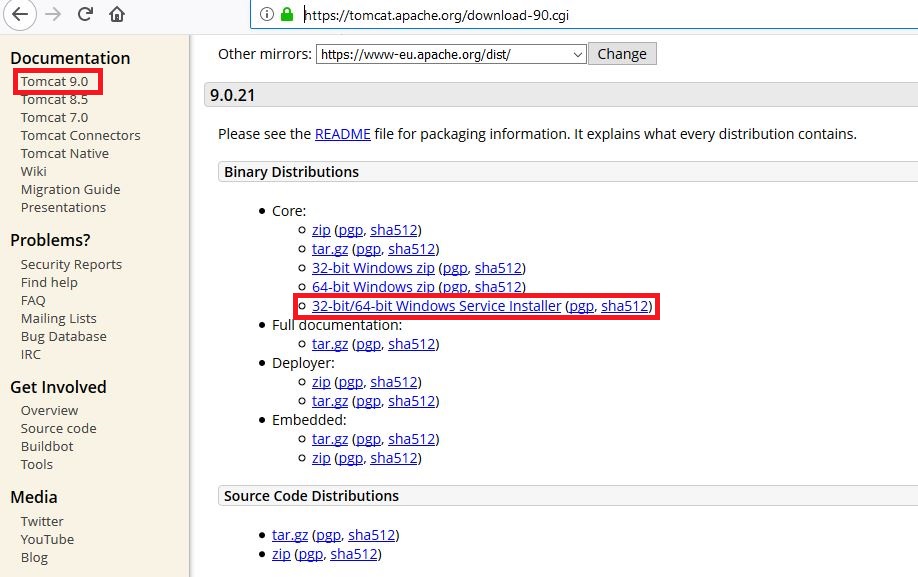
- 1.3 Install Tomcat-9.0: Click here to download tomcat https://tomcat.apache.org/download-90.cgi
Step-02: Environment Variables Setup: Go to → My Computer (Right Click) → Properties → Advanced system settings → Environmental Variables

Variable Name: DHIS2_HOME
Value: C:\DHIS2

Variable Name: JAVA_OPTS
Value: -Xms1024m -Xmx2048m -XX:PermSize=256m -XX:MaxPermSize=1024m


Don’t forget to allow login privilege:


You can download from here Download now
				# Hibernate SQL dialect
				connection.dialect = org.hibernate.dialect.PostgreSQLDialect
				# JDBC driver class
				connection.driver_class = org.postgresql.Driver
				# Database connection URL
				connection.url = jdbc:postgresql:dhis2
				# Database username
				connection.username = dhis
				# Database password
				connection.password = dhis
				# Database schema behavior, can be validate, update, create, create-drop
				connection.schema = update

				# Encryption password (sensitive)
				encryption.password = abcd


Location: C:\Program Files\Apache Software Foundation\Tomcat 9.0\bin


				http://localhost:8080/dhis
				Username: admin
				Password: district


DHIS2 instillation in linux
https://docs.dhis2.org/2.28/en/implementer/html/install_server_setup.html https://github.com/adeelshahid/dhis2-core-ansibleDHIS2 instillation in Mac OSX
https://dhis2.github.io/guides/01-dhis2-basic-setupConfigure your domain and hosting in Digital Ocean Droplet
http://dhis2trainingland.com/eportal/?tutorial=domain-and-hosting-configuration-in-digital-oceanLast updated: 2019-06-18